
How to create your own presets in Lightroom
Creating your own presets or saving a purchased presets is game changer! Maybe you purchase a preset, but find that you always have to adjust the exposure. You can save the preset with your adjustments as it’s own customized preset! In this blog post, we teach you how to create your own presets in Lightroom.
If you have not downloaded the Mobile Lightroom App, it’s FREE, what are you waiting for? Download it here.
How to create your own presets in Lightroom
This is a set of instructions for creating a custom preset in Adobe Lightroom, a photo editing software. To create a custom preset, you need to follow these steps:
- Open the Presets panel in Adobe Lightroom
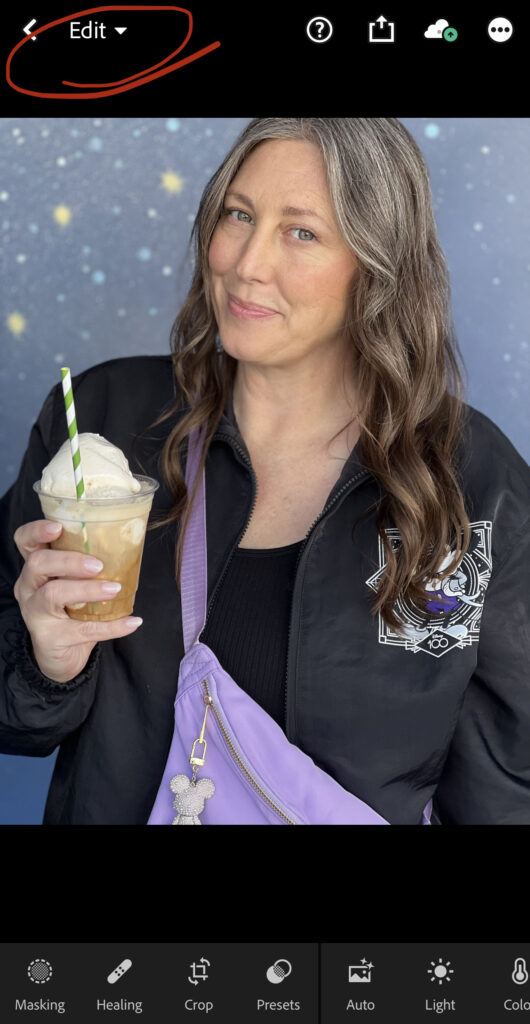
- Click the “Edit” icon and edit your image to your preference
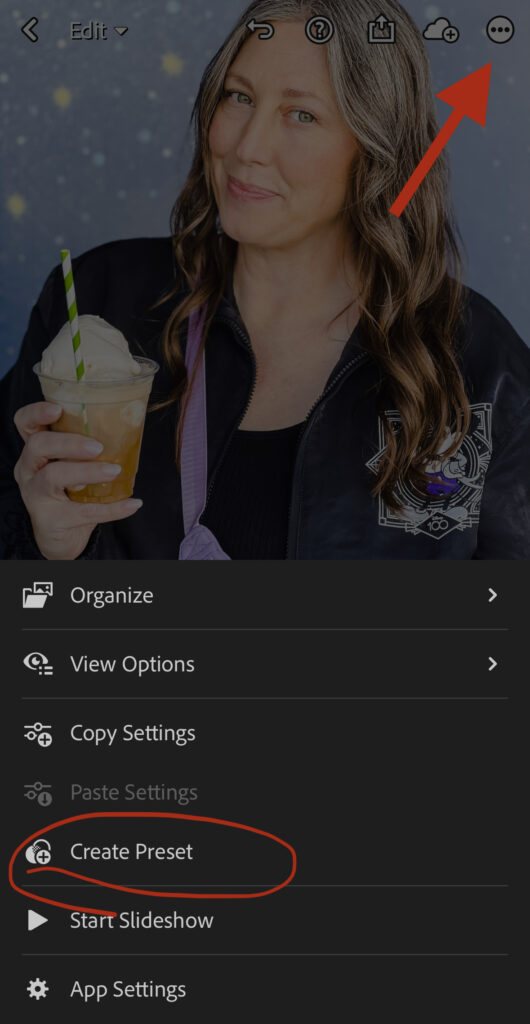
- Click the three dots at the top right of the Presets panel and select “Create Preset”
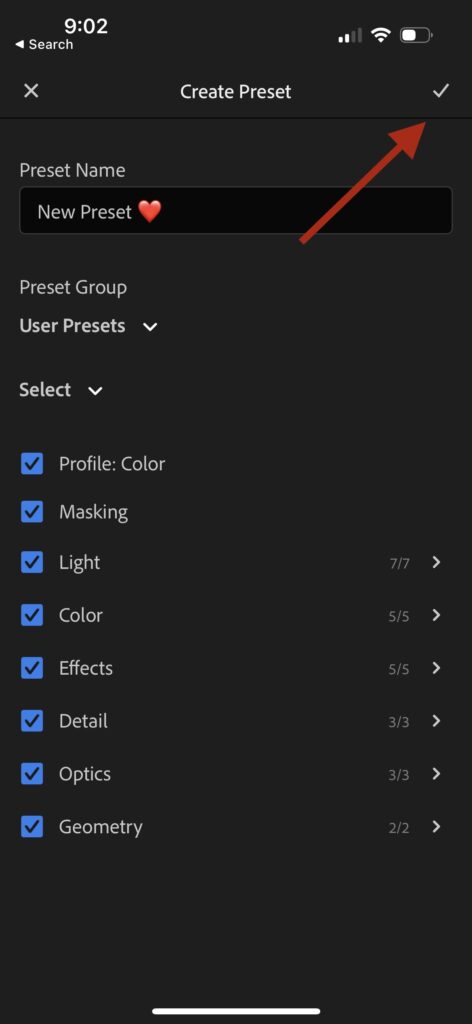
- Give the preset a name and click “Save”
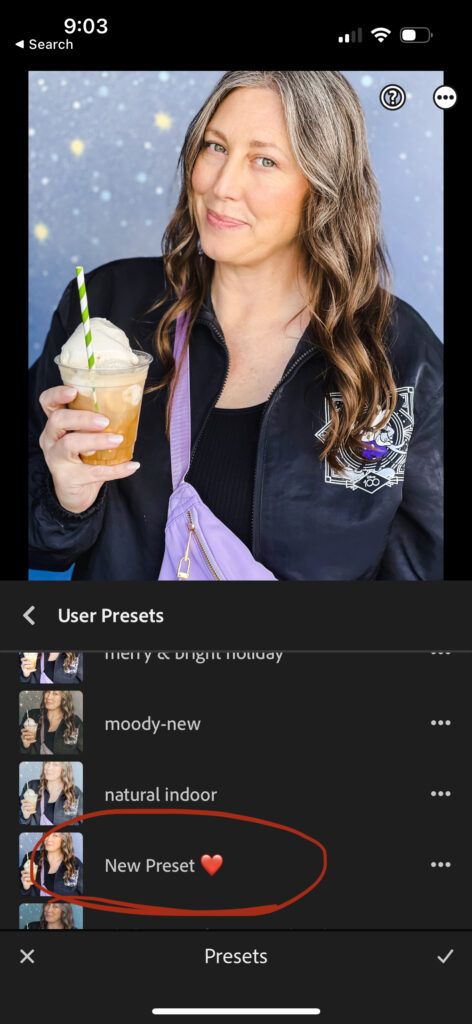
- Your custom preset will now be listed in the “User Presets” category, ready for you to use on other photos.
If you are looking for our article on the 6 reasons to use presets, you can find it HERE.
